1. TL;DR: What happened?
I went out to hunt for a linux distro which was:
- “Enterprisey” distro (For learning purpose, but also for stability. Do you really want the “bleeding edge” to bleed out your time?)
- Stable when it comes to updates. Things only update when I manually do it.
- Be able to run CUDA for Deep Learning with a Nvidia RTX 2060 Super GPU
2. Things to know beforehand
- Worflow of OS installation
- Hard disk partition types and schema: NTFS, ext2, GPT.
- Basic bash commands
3. Resources
- Ubuntu vs OpenSUSE
- Reason why some nvidia drivers might not work.
- OpenSUSE ISO
- Balena Etcher
- OpenSUSE installation quickstart
- OpenSUSE Tutorial for installation
- nvidia driver for linux x86_64
- Installation procedures for .run driver from nvidia archives
- CUDA toolkit archive。
4. Choosing the Distro
The major factor which limits what distros you can choose is CUDA’s support for said distros.

Among the choices available, there are a few clear red flags.
- Support for CentOS is planned to be stopped around ~2021 - 2022, so it might not be the best.
- WSL-Ubuntu is not a “real” distro. There are reasons for being exciting about WSL2, but that’s out of the context of this post.
- Debian is much more stable, but seems to be more of a hassle to set up for non-server purposes and geared toward people with more expertise than I currently have.
Another consideration was the esthetics. I love material/flat-style UI, and KDE-plasma is an awesome desktop UI for linux.
Among the distros that remain, those who support KDE plasma out of the box are:
- OpenSUSE
- Kubuntu (Ubuntu basically)
At this point, it came down to choosing between Ubuntu and OpenSUSE. After reading around for a bit Ubuntu vs OpenSUSE and Why you should be using OpenSUSE, I leaned toward OpenSUSE, mainly for the following:
- It’s a RPM-based distro, rather than debian-based.
- There is an enterprise version, SLES (which is hopefully used by some enterprises).
Honorable mention: Manjaro is a distro based on Arch Linux. It looks great and feels great. Unfortunately, I’m not too sure if it is supported by CUDA, but it definitely seems like the most tinkering-friendly (or frustrating, depending on your take) distro out there.
5. Installing OpenSUSE
Check your firmware
The firmware is the tiny piece of software that used to be called “BIOS”. But it’s rather confusing as BIOS has mostly been replaced by UEFI/EFI in modern PCs.
But it’s good to make sure that you indeed have EFI firmware.
On windows, you can use win + r and run msinfo32 to see. You should see the following:
Processor	AMD Ryzen 5 3600 6-Core Processor, 3600 Mhz, 6 Core(s), 12 Logical Processor(s)
BIOS Version/Date	American Megatrends Inc. 3.50, 11/7/2019
SMBIOS Version	2.8
Embedded Controller Version	255.255
BIOS Mode	UEFI
BaseBoard Manufacturer	Micro-Star International Co., Ltd
BaseBoard Product	B450 TOMAHAWK MAX (MS-7C02)
BaseBoard Version	1.0
If you see BIOS Mode: UEFI then you should be good.
Freeing up space for OpenSUSE
Only perform this step if you intend to install linux on the same partition as an existing windows partition.
Using win + r, run diskmgmt.msc. You can shrink existing partitions on your disk to free up space for OpenSUSE.
This would also be a good time to note down the size and order of your partitions, so you know which one is which when you install OpenSUSE.
You should allocate about ~40 GB for OpenSUSE minimum, but I allocated ~200GB for software I’m planning to use for my projects.
You can only shrink/extend a partition if there’s space right next to it! If for some reason you need to move partitions around to create space, you could try a better software like EaseUS Partition Master.
It will be possible to mount your NTFS drive in OpenSUSE, so you can “share” a partition for both linux/windows, but it is NOT recommended to use the partition where your windows is installed, as you could mess your windows up.
Setting firmware options
Here’s a list of settings you need to tweak on your firmware before you can start installing OpenSUSE.
- Disable secure boot. (Apparently OpenSUSE supports secure boot, but not all linux distros do, and it’s a good idea in general to disable when installing another OS)
- Disable CSM mode if applicable in your firmware (some firmware have a CMS vs UEFI mode, and we want to use the latter)
- Disable Fastboot
- For those with an Intel CPU, disable Optane Memory/Rapid Storage Technology
- In the boot option, put UEFI USB first.
Installing OpenSUSE
Next, we can download the official OpenSUSE ISO.
Booting from the USB and installing the OS should be fairly straightforward, according to the instructions.
OpenSUSE has been one of the best distros I’ve tried in terms of helping you get the partitions right.

There are two things you need to make sure of:
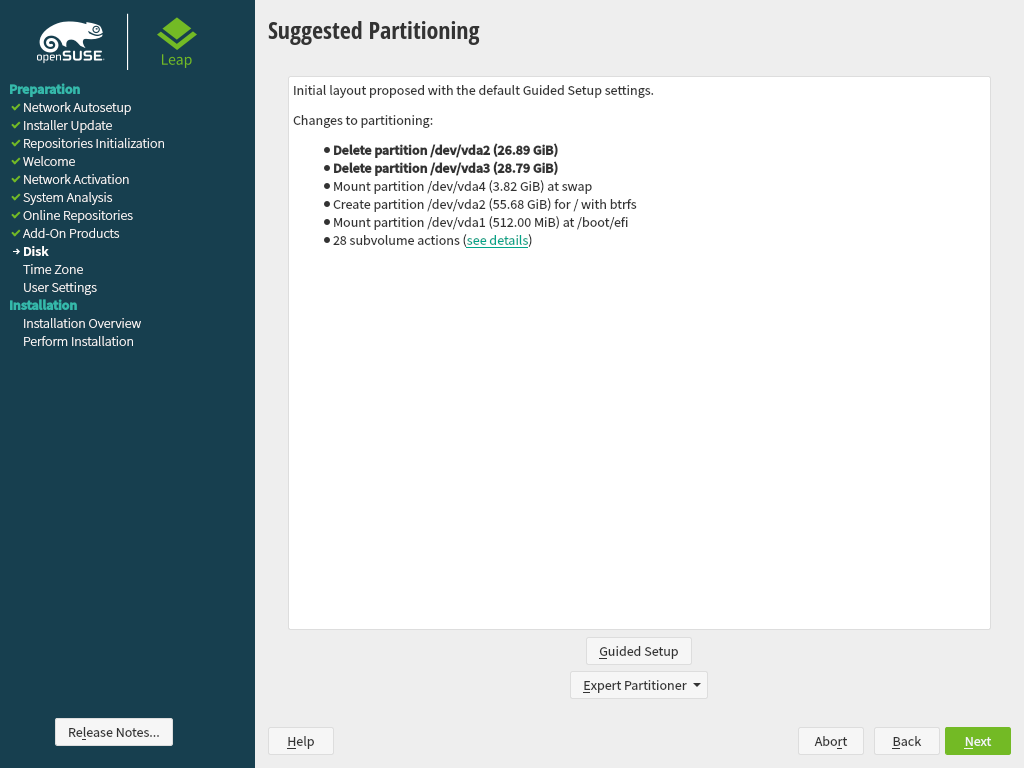
- None of your windows partitions are getting deleted (you can check for that at the summary table at the end. You’ll know which one it is by the size.)
- The windows boot manager (typically partition 1) is mounted at /efi. This is so that OpenSUSE can share the boot manager with windows, allowing you to choose your OS at boot.
6. Getting Nvidia drivers to work on OpenSUSE
Here’s an (unfunny) joke: How many Nvidia engineers does it take to make a functional Nvidia driver?
Answer: None, because they absolutely do not care. (Credit to my friend Guenter for this one)
Seriously, I have nothing against the people working at nvidia, but nvidia and Linux really go like water and oil.
I have tried many distros to try to get it to work, and here are the results:
| Distro | Results of trying to install lastest stable nvidia drivers as of 2021/06 |
|---|---|
| Ubuntu 20.04 LTS | Unable to boot after installing nvidia drivers. Only rescue mode/TTY works. |
| Ubuntu 18.04 LTS | Unable to even boot the USB stick. Nouveau is probably broken. |
| Manjaro 21.0.4 | Unable to boot USB image. Installed like a breeze after manually swapping for a 10 year old ATi card. Then, when I plug multiple DP monitors with nvidia drivers, it fails again |
| Debian 10 | Unable to boot desktop after installing nvidia drivers. Only TTY works. |
| Fedora 33 | Unable to boot desktop after installing nvidia drivers. Only TTY works. |
| CentOS 8 | Unable to boot desktop after installing nvidia drivers. Only TTY works. |
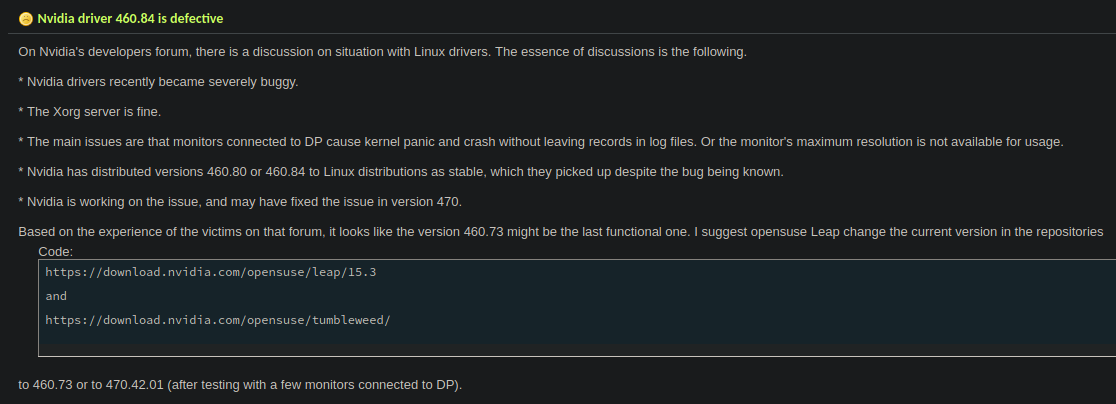
After a few weeks of frustration, I came across This post on the openSUSE forums.

Aha.
You will need to manually install the .run file from the nvidia drivers’ archive, you can follow the instructions from OpenSUSE here.
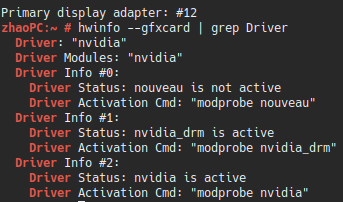
Now you can check for the nvidia-driver version with nvidia-smi and sudo hwinfo --gfxcard.

7. Getting CUDA toolkit to work
Once you have functional nvidia drivers, you should see the compatible CUDA toolkit on the top right of the output when you run nvidia-smi.
You should then go and download the appropriate CUDA toolkit for your distro.
Note: if you see missing recommended libraries for samples, you can install the dependencies using zypper.
sudo zypper install freeglut-devel libX11-devel libXi-devel libXmu-devel \
   make Mesa-libGL-devel
Important: Do NOT forget to update $PATH and $LIB. You can use the following command in ~/.bash_profile to modify your environment variables.
export PATH="$PATH:/usr/local/cuda-11.2/bin"
export LD_LIBRARY_PATH="$LD_LIBRARY_PATH:/usr/local/cuda-11.2/lib64"
Finally, you can use nvcc -v to verify that cuda toolkit has indeed been installed.
8. Conlusion and Next Steps
Voila. We’re done. We now have a working OS + CUDA. In the next post, I’ll talk about a few handy tools we can use to quickly get set up for actually using openSUSE everyday.
Note: ALWAYS be wary of updating the linux kernel, as it may or may not mess up graphics drivers!

